certbot-dns-cloudflare: 使用 Token 進行 dns-01challenge

TL;RD

  • 在Ubuntu使用 certbot-auto 安裝certbot,PPA或官方repo都太舊不支援token
  • 使用 pipenv切進去certbot的目錄,用pip安裝plugin

Step by step

Check the command before you paste it

安裝Certbot-auto

From [1]

wget https://dl.eff.org/certbot-auto 
sudo mv certbot-auto /usr/local/bin/certbot-auto 
sudo chown root /usr/local/bin/certbot-auto 
sudo chmod 0755 /usr/local/bin/certbot-auto 
/usr/local/bin/certbot-auto --help

安裝 certbot-dns-cloudflare Plugin

From [2]

find / -name certbot
# [Output] /opt/eff.org/certbot 
cd /opt/eff.org/certbot/venv 
source bin/activate 
pip install certbot-dns-cloudflare deactivate

設定Cloudflare Token、取得憑證與定時更新

From [3]

sudo mkdir /root/.secrets/ 
sudo chmod 700 /root/.secrets/ 
sudo vim /root/.secrets/cloudflare.ini 
# 輸入: dns_cloudflare_api_token = CHANGEME 
# 在cloudflare上開token,權限 Zone:Zone:Read, Zone:DNS:Edit for all zones 
sudo chmod 600 /root/.secrets/cloudflare.ini 
sudo chmod certbot-auto certonly \\
--dns-cloudflare \\
--dns-cloudflare-credentials ~/.secrets/cloudflare.ini \\
-d example.com 
# -vvv開Debug mode 

From certbot crontab man page (?)

sudo su - 
crontab -e 
# 輸入: 0 0 15 * * /usr/local/bin/certbot-auto renew --post-hook systemctl restart [SERVICE]

事情經過 a.k.a.流水帳

DNS-01只需要txt紀錄,不用外網、不用tcp 80 port 這麼棒的東西一定要用阿
在Ubuntu 18.04直覺的使用sudo apt install certbot python3-certbot-dns-cloudflare安裝套件
找到文件 [3] 直接開工
既然token比較安全,文件又推薦就用tokenㄅ
產生憑證時出現

Missing properties in credentials configuration file /root/.secrets/cloudflare.ini: 
* Property dns_cloudflare_email not found (should be email address associated with Cloudflare account). 
* Property dns_cloudflare_api_key not found (should be API key for Cloudflare account, obtained from https://www.cloudflare.com/a/account/my-account). 

這是Global Key阿
把錯誤訊息在程式碼中搜尋,token有相關的code R

忘記在那看到可能是版本問題

apt-cache policy certbot | grep -i Installed 

Ubuntu Repo: 0.27, GitHub上: 1.2

好ㄅ那就用官方Ubuntu PPA
PPA python-certbot 版本: 0.31
PPA python-certbot-dns-cloudflare 版本: 0.23
WTH

另外發現Token是今年2020/01更新的,1.2開始出現
所以只好用certbot-auto裝了

沒 只是想抱怨而已

Reference

[1] https://certbot.eff.org/docs/install.html#certbot-auto
[2] https://devops.stackexchange.com/questions/3757/how-to-install-certbot-plugins
[3] https://certbot-dns-cloudflare.readthedocs.io/en/stable/
Firefox Problem on Accessing Remote’s “localhost” via Sock5

問題

當遠端網頁服務只聽在遠端的本地時,可以使用ssh dymanic tunnel
但firefox 72 proxy設定中就算取消了localhost bypass也沒辦法連過去

解法

找到這篇

  1. Firefox網址輸入 about:config ,然後確定自己承擔風險(?)
  2. 修改 network.proxy.allow_hijacking_localhostTrue

:tada:

Gmail Backup

原因

很多收據、帳單、證明都用email寄送
沒第二份備份有點怕怕的
抱持著備份一定要做很多份的心態,來找mail backup的解法

Getmail

  • getmail透過imap,將gmail下載並以maildir形式存於指定目錄
  • 流程的話基本上照抄Arch Wiki的步驟
    • 我把設定中改為 mailboxes = ALL 來存下所有mail
    • 設定參數True/False首字須大寫,否則還是會保持預設值

View and Check

  • 可使用mutt來讀maildir: mutt -f <maildir_location>

Saned on OpenWRT

快速紀錄一下怎麼用saned架scanner server

情境

  • 有一台USB Scanner、一台OpenWRT Router with USB Port,想從網路連接掃描機做掃描

安裝方式

Server side(OpenWRT)

  • AP資訊:DIR-835, OpenWRT 15.05
  • 安裝套件 (opkg update && opkg install [packages])
    • 掃描軟體和驅動:libsane、sane-frontends、sane-genesys
    • 網路相關:xinetd、sane-daemon、sane-net
  • 設定:
    • Saned有分前後端,前端做網路連接,後端跟硬體有關所以要裝對
    • Saned
      • 確定找得到掃描機 sane-find-scanner
      • 確定sane的前端抓得到掃描機 scanimage -L
    • Xinetd
      • Guide by openwrt (內含xinet設定): saned scanner server
      • /etc/xinet.d/sane-port 多一行 protocol = tcp
      • /etc/init.d/xinetd start 執行網路deamon.
  • [Optional] 防火牆記得開洞

Client side (Ubuntu)

  • 安裝基本軟體 sudo apt install sane sane-utils
  • sudo vim /etc/sane.d/net.conf 加一行AP(scanner)的IP or Domain Name
  • 執行 scanimage -L 確認掃描機是否能連上
  • 設定掃描機IP or domain sudo vim /etc/sane.d/net.conf
  • 可用 GNOME內建的 simple scan 掃,或專業的 xsane

Client side(Android)

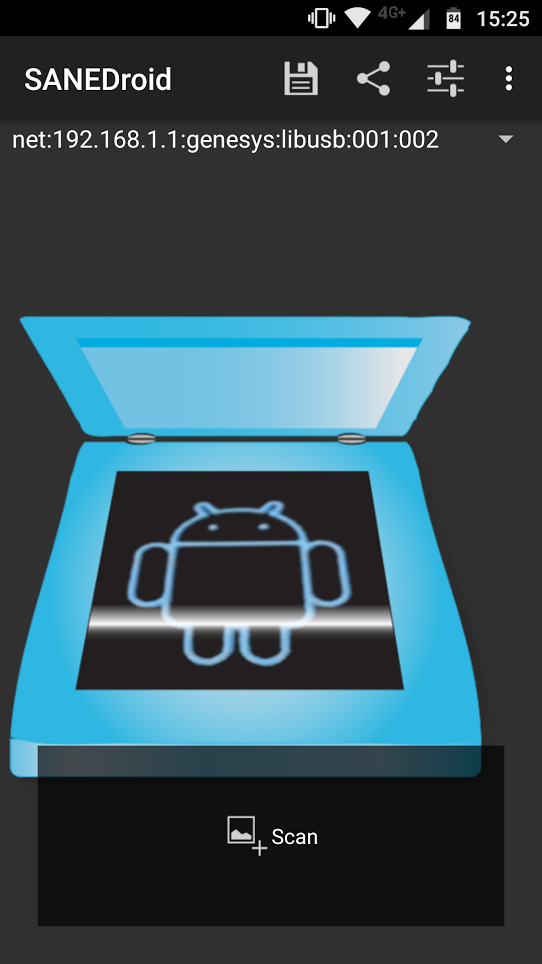
  • 下載SANEDroid
  • 在(設定) > Preferences > SANE_NET_HOSTS,改為AP(scanner)的IP or Domain Name
  • (設定) > Refresh Device List,應該會找到掃描機如圖:

Client side(Windows - SaneTwain)

  • 下載SaneTwain
  • 安裝後執行 ScanImage
  • Hostname 輸入AP IP位置 140.113.194.247,並刪除username
  • 功能
    • [左上圖示1] 掃描:選擇存檔位置後掃描
    • [左上圖示2] 掃描預覽
    • [右上選單] 選擇Resolution(DPI)
    • [中間] 預覽,可選取掃描位置

Client side(Windows - wiasane)

  • 將SANE轉換為Windows的掃描機(Windows Image Acquisition)
  • 下載位置
  • 安裝時會問掃描機位置,裝完之後會產生一windows掃描機

Debug

  • Sane Server

    • Sane Server(saned)執行於AP上,由xinet監聽網路port,當有人連至tcp 6566 port時執行saned
    • Saned Control(tcp 6566)一次只能一人用,若連不進去看看有沒有人佔用
  • SaneTwain

    • 掃描或預掃程式會看起來像卡住
    • 關閉時可能會遇到記憶體錯誤

Reference

  1. sane-project
  2. saned scanner server by OpenWRT

Cacti-1.04 on CentOS7 架設筆記

關閉防火牆、查看IP並連接ssh

yum install vim
systemctl firewalld stop
ip addr

新增marinaDB套件來源 (5.4 -> 10.1)

vim /etc/yum.repos.d/MariaDB.repo

    # MariaDB 10.1 CentOS repository list - created 2017-04-18 11:15 UTC
    # http://downloads.mariadb.org/mariadb/repositories/
    [mariadb]
    name = MariaDB
    baseurl = http://yum.mariadb.org/10.1/centos7-amd64
    gpgkey=https://yum.mariadb.org/RPM-GPG-KEY-MariaDB
    gpgcheck=1

安裝需求套件

yum install -y httpd mariadb-server php php-mysql php-pear php-gd php-mbstring net-snmp net-snmp-utils rrdtool

yum install -y epel-release

yum install -y cacti

建立資料庫

systemctl enable mariadb

systemctl start mariadb

mysql_secure_installation (打完密碼後一直按enter)

mysql -u root -p -A mysql

MariaDB > create database cacti;

MariaDB > GRANT SELECT ON mysql.time_zone_name TO cacti@localhost IDENTIFIED BY 'cactipassword';

MariaDB > grant all privileges on cacti.* to cacti@localhost identified by 'cactipassword';

MariaDB > flush privileges;

MariaDB > exit

mysql -u root -p -A cacti < /usr/share/doc/cacti-1.0.4/cacti.sql

設定 httpd、cacti db、php

vim /etc/httpd/conf.d/cacti.conf

新增 Require ip 192.168.56.0/24


vi /etc/cacti/db.php

    $database_type = "mysql";
    $database_default = "cacti";
    $database_hostname = "localhost";
    $database_username = "cacti";
    $database_password = "cactipassword";
    $database_port = "3306";
    $database_ssl = false;

vim /etc/php.ini 在最後加上

    date.timezone = Asia/Taipei

vim /etc/my.cnf

[mysqld]

innodb_buffer_pool_size = 512M

symbolic-links=0

character-set-server=utf8mb4
collation-server=utf8mb4_unicode_ci
init-connect='SET NAMES utf8'
lower_case_table_names=0

max_heap_table_size=90M
max_allowed_packet=167M
tmp_table_size = 64M
join_buffer_size =128M
sort_buffer_size = 4M
read_rnd_buffer_size = 4M
innodb_doublewrite = OFF
innodb_flush_log_at_timeout = 3
innodb_read_io_threads = 32
innodb_write_io_threads = 16
sql_mode=NO_ENGINE_SUBSTITUTION,STRICT_TRANS_TABLES
innodb_additional_mem_pool_size = 80M
#default_time_zone = Asia/Taipei

log-error=/var/log/mysqld.log

mysql_tzinfo_to_sql /usr/share/zoneinfo | mysql -u root -p mysql

systemctl restart mysqld

sed -i 's/^/#/g' /etc/httpd/conf.d/welcome.conf

systemctl enable httpd

systemctl start httpd

網頁設置

用瀏覽器打開 http://linux.host.ip/cacti/install

  1. 勾選同意,Next

  2. 確認畫面沒有紅字,Next

  3. Next*2,直到看到這個畫面,全勾後Next

  4. 登入,預設帳密皆為admin

  5. 輸入新密碼

  6. 燈愣/

One more thing

vi /etc/cron.d/cacti
取消註解

*/5 * * * * cacti   /usr/bin/php /usr/share/cacti/poller.php > /dev/null 2>&1

systemctl enable snmpd
systemctl start snmpd

新增switch

  1. 點選 devices

  2. 點選 add

  3. 輸入以下資訊,並點選右下方 "Create"

  4. 完成後會看到"SNMP Information 有相關資訊",點選"Create Graphs for this Device"新增圖表

  5. 選取所有資料源,並按右下方 "Create"

  6. 點選右方選單"Trees"

  7. 點選 "Default tree"

  8. 點選 "Edit tree"

  9. 將"snmg_test"拖曳至左方裝置的上方或下方

  10. 點選右方"Save"

  11. 經過一段時間(10~15min)後,即可看到出現統計圖

Reference

  1. https://downloads.mariadb.org/mariadb/repositories/#mirror=ossplanet&distro=CentOS&distro_release=centos7-amd64--centos7&version=10.1
  2. http://jamyy.us.to/blog/2015/10/7767.html
  3. http://forums.cacti.net/viewtopic.php?f=21&t=56848